How to Change the Rear Sight on Most Semi Automatic Handguns
Removing the rear sights on any handgun is easy with the right tools
Removing and replacing the sights on most handguns is very easy so long as you have the right tooling to do so. Typically, removing the rear sight is the trickiest part.
In this short 3 minute tutorial we show you the proper way to remove and replace the rear sight on your semi automatic handgun. The process is easy and any responsible gun owner should be able to do this at home.
Use a Rear Sight Pusher, it is worth its weight in gold
Use the right tools for the job. Some people will advocate putting your slide in a vice and using a punch to remove and replace sights. This is a pain in the butt and can damage your slide. It makes the job much harder than it needs to be. A quality sight pusher can be purchased on amazon for less than $50.
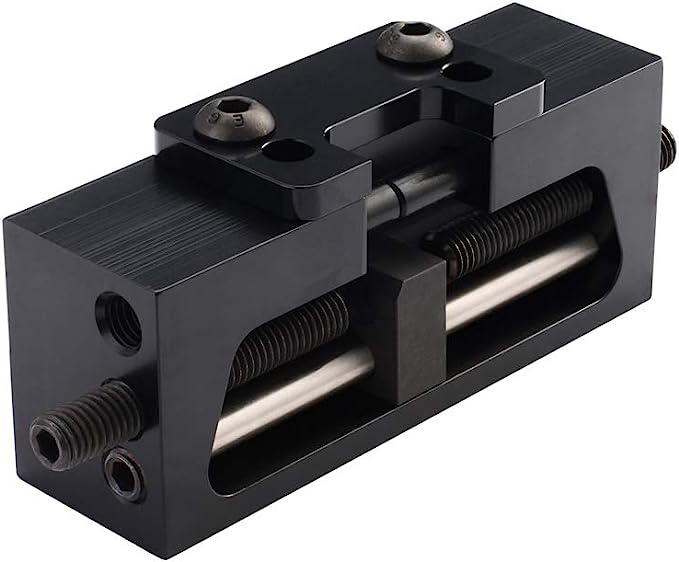
Quality Sight Pusher
This is the sight pusher that we use in our tutorial. It is extremely heavy built.
- Affordable (we paid less than $40)
- The heaviest duty sight pusher we could find
- Makes the job of changing out rear sights super easy
- Also can be used for mounting rear red dot plates
- None Really
You’ll pay more than that to have a gunsmith change out your rear sight a single time, and by buying the tool, you will be able to DIY this job on all of your pistols for the rest of your life. I highly recommend buying a sight pusher.
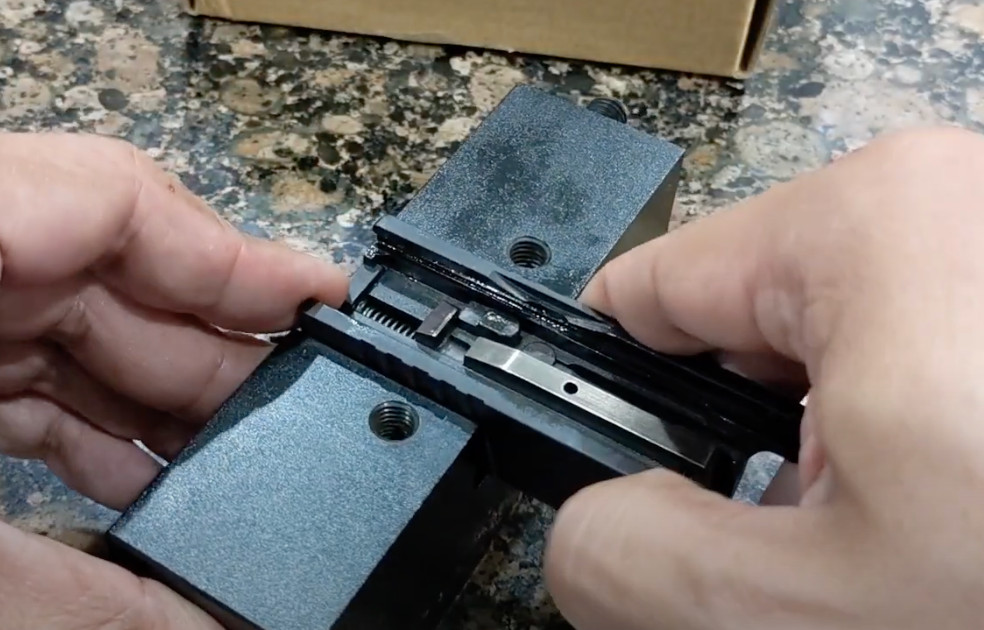
Step 0: Prepare the Sight Pusher
- Unscrew the set screws on the right and left side of the sight pusher.
- Pay attention to the metal sight pushing block. One side will be a straight edge, the other is an angled edge. Which side will push against the sights will depend on the angle of your removable dovetail sights (some have a flat 90 degree angle edge while others are angled)
- Install the rubber gasket lining to prevent the slide from getting scratched during the process
Step 1: Make sure your weapon is empty before beginning any work
- Remove the magazine from the weapon
- Rack the slide and make sure the chamber is empty before doing any work
- Treat every gun as if it is loaded and follow all of the universal firearm safety rules, even if you are sure the weapon is empty
- Keep all ammunition stored in an entirely different room, separate from your work space
- Keep your weapon supervised at all times, especially if you have children in the house. Do not walk away from your firearm even if disassembled.
Step 2: Disassemble the weapon
Important: Now that we’ve verified that the weapon is empty and we’ve set up every possible safety precaution, its time to disassemble the weapon:
- Remove the slide from the frame
- Remove the barrel and recoil spring
Step 3: Install the slide into the sight pusher
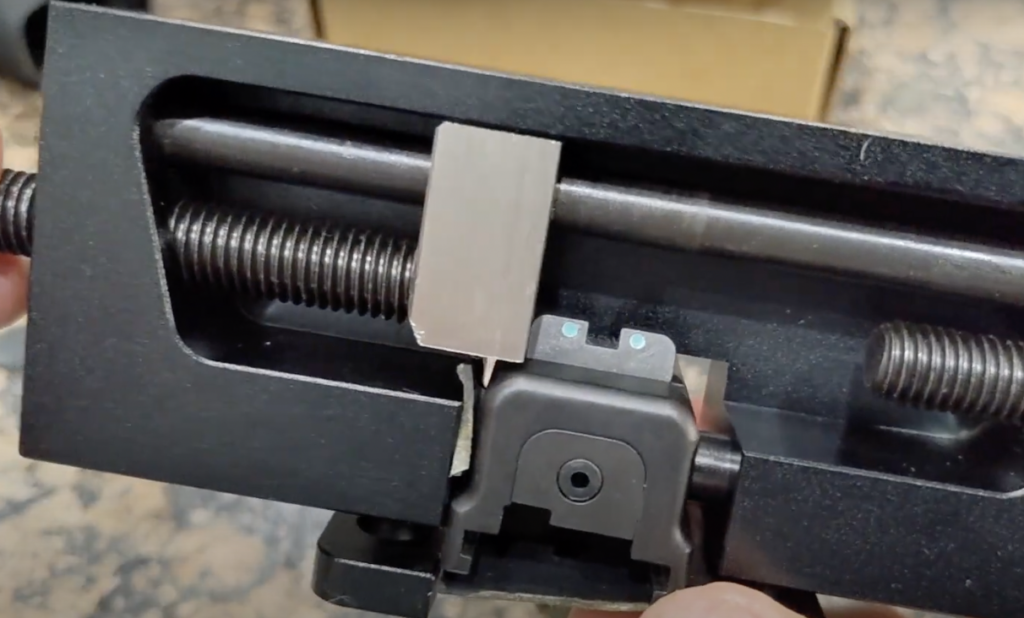
Insert the slide into the sight pusher. Position the slide so that the metal block of the sight pusher can slide freely over the slide, but will make contact with the rear sights themselves.
If there isn’t enough clearance to slide the slide into the sight pusher with the floor plate installed, as is the case on many slides, remove the floor plate prior to inserting the slide.
You may also want to insert pieces of the rubber gasket between the slide and the set screws before tensioning the set screws to protect the slide.
Tighten the lower set screws and bolt the floorplate back into place if you removed it.
Step 4: Tighten the sight pusher set screws to put pressure on the rear sight
Tighten the set screws and you’ll see the rear sight start to move.
Note: Some models like the springfield XD have notoriously tight rear sights. You may need to clamp the block in a bench vice to get enough leverage to be able to tighten the set screws.
Brands like glock typically remove much easier.
Step 5: Loosen all set screws to remove the slide
Simply loosen all of the set screws to remove the slide.
Step 6: Install the new rear sight
To install the new rear sight, we’ll do the same exact process, except in reverse.
You want to go slow when installing the new sight. Get it close to center by eyeballing it when re-installing.
It is helpful to use a laser bore sighter to remove the slide periodically and confirm zero. You will likely have to make fine tuned left and right adjustments to get the rear sight perfectly zeroed.
Note that you can even consider mounting a red dot with a rear sight replacement plate instead of a traditional rear sight.
Conclusion
Installing a rear sight is an easy process if you have the right tools. Take your time and be safe.