Introduction
Project MARS stands for Marksmanship Augmented Reality Simulators. We want to make dryfire training commonplace in order to raise the bar on firearms safety and general marksmanship skills amongst responsible gun owners. MARS mobile is our first product in a line of virtual shooting simulators. To do this, we focus in on practical shooting skills, rather than focusing on accuracy solely alone. This is what separate Project MARS from other dryfire simulator products.
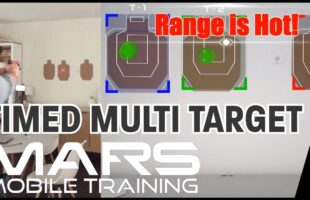
Multi Target Focus
Bullseye shooting is not the goal of our app, and there are other apps that are better suited for that purpose. Rather, MARS is built around multi target transitions. As such, the full verison of MARS Mobile allows you to set up to 6 different targets. Since we are focused around competition shooting but also want to promote accessibility for any responsible gun owner, we’ve built the app around USPSA cardboard targets primarily.
See our equipment guide for recommendations on required equipment, and while MARS can technically be used with most targets, we only formally support USPSA style cardboard targets.
We have printable targets, as well as guides on how to make USPSA targets from cardboard at home.
Or you can simply buy precut USPSA targets as they are generally pretty affordable.
Getting Started
After accepting reading through our terms and conditions and accepting our conditions, and accepting relevant app permissions required for MARS to run, you’ll find yourself in a main menu area.
Setting up your phone, tripod, and physical targets
You’ll need to set up a tripod with a phone adapter that supports orienting the phone horizontally or landscape mode. MARS does not support portrait orientation. Set up your phone and tripod so that all targets are visible. The distance that you are from the targets for dryfire doesn’t matter, but the distance of the phone to the targets does. Try to keep the phone 3 to 5 yards or so from the targets. If the targets are too far away, the camera may not be able to pick up the laser hits. If the targets are too close, the laser may be too wide and the app may confuse it for ambient lighting.
Setting Up Virtual Target Areas
Once in the app, you can set up different target areas. We support 4 different target types.
- USPSA style Metric targets
- IPSC style classic targets
- rectangular targets
- round targets
Click the button in the lower left to change target types.
Drag the square corners until the target area overlaps the target area. Ideally, the targets will be squared to the camera.
Note: If the targets are at an angle, MARS can still work, but the hit detection will not be as accurate.
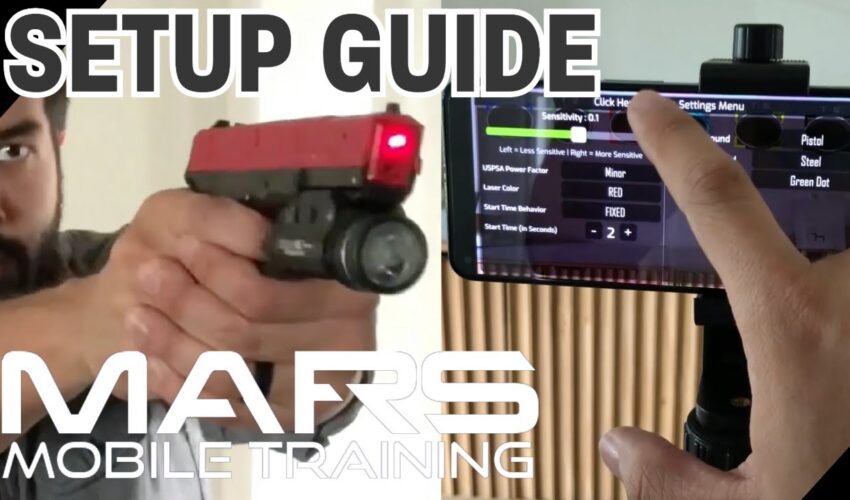
App Settings and Configuration
Under the settings menu you can customize a great deal about the app including adjusting laser detection sensitivity, most users will be okay with stock sensitivity settings.
Adjusting power factor for hit factor calculation if you are a competition shooter: MAJOR or MINOR Power factor scoring is supported.
Whether or not you are using a red or green dryfire laser, by default red will be selected. IR is not supported out of box as camera phones typically have IR color filters installed. We are working on a desktop version that can be used with a USB IR camera in the future.
You can modify the start timer behavior for certain game modes. You can tell MARS how long it should wait between the shooter ready command and the shot timer beep, with a minimum start of 2 seconds or greater. If you choose random, the timer will be between 2 seconds and whatever value you specify. You can also adjust weapons sounds such as pistol, rifle, or shotgun.
The target hit sound can also be changed, by default a steel hit sound will be used, to me it is by far the most satisfying.
And you can change the hit icon. A standard green do will be used by default, but you can also used a bullet hole icon if you prefer.
After closing the settings and with targets set up, you can hit continue in the bottom right of the target setup menu which will open the game mode selection.
Game Mode Selection
Most game modes and drills will be locked in the free version of the app. Similarly, you’ll be capped at 2 target areas in the free version. The paid version of the app is a one time purchase and will include all features of the app, as well as all future updates.
Switching to Drills
In the top left corner you’ll see a menu option to switch to drills. The drills are similar to the game modes, but they feature a fast and easy setup and are pretty typical drills that competitive shooters like to use.
Need Support?
If you want to see more features added to the app or you have suggestions on things we can improve. Contact me via our contact form or leave us a comment on one of our youtube videos. This is the best way to contact me. I do my absolute best to read and respond to every comment. Thank you for your support.